How to Use Google Ads - 5 Tips To Get You Started
Tip #1 - How to open a Google Ads account & claim £75 in free Google Ads credit
Step 1- If you don’t have a Google account you can setup a Google account with this link --> Google Ads
Step 2- Next, go to this link to claim your £75 in ads credit. You will then receive a coupon code in your mailbox and will be able to use the code after you setup your account.
Step 3- Click on 'Start now' to begin using Google Ads.
Tip #2- How to finish the setup & use Google Ads in expert mode
Step 1- To get the most out of your Google Ads account, we recommend selecting 'switch to expert mode'.

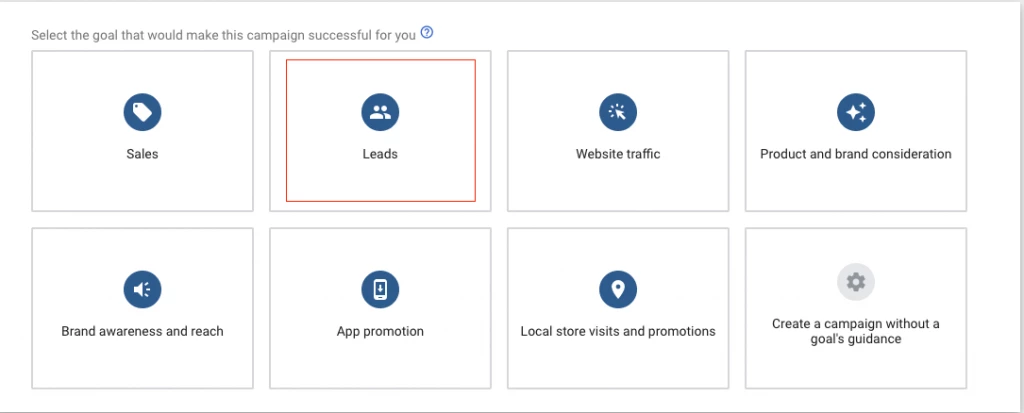
Step 2- Next, select the goal that is most suitable for your business. For this example we have selected 'Leads'.
Step 3- Now select a campaign type. The 'search' campaign type is often the most used campaign type that allows for greater control.

Step 4- You will now be setting up ad groups to create the structure of your Google Ads campaign.
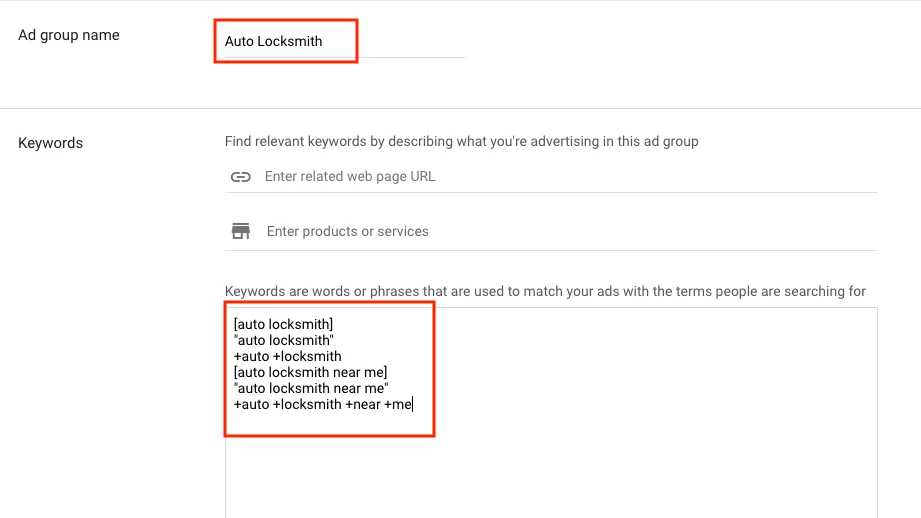
For this example- lets say you are a locksmith and offer multiple services such as vehicle entry and door entry. You would want to breakdown your ad groups into the different services you offer so that you have greater control over the campaign and the keywords used.
In the screenshot below, you can see that we have created an ‘Auto locksmith’ ad group that only contains ‘Auto locksmith’ related keywords with different match types.
Step 5- Now that we have an ad group that is very specific, we can now tailor our ads to make them relevant.
By increasing ad relevancy, we are able to increase our ad quality. Which in return will allow our ads to be shown for the most relevant searches and will likely increase our click through rate and conversion rate.
In the screenshot below, you can see that we have populated the fields with ‘Auto locksmith’ related keywords and have also listed a number of USP’s. On the right, we are also able to see what our ads will look like.
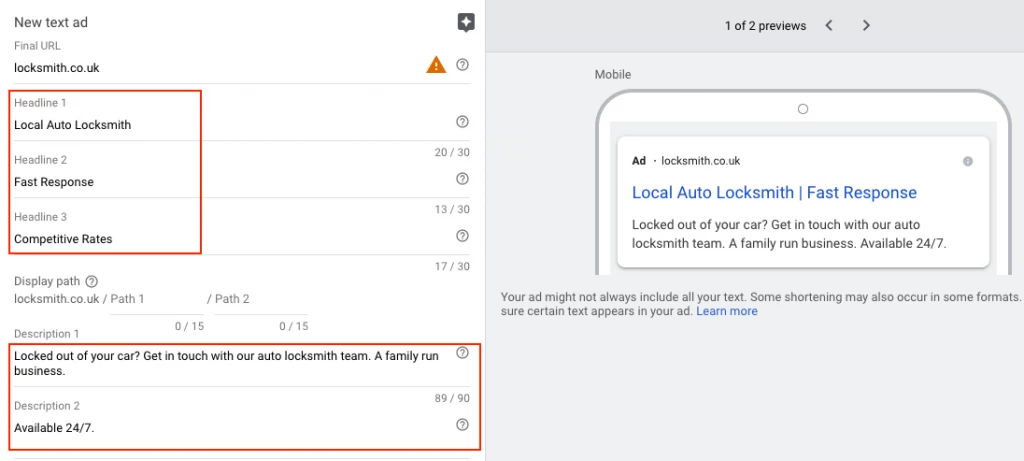
Quick Tip- hit ‘done and create new ad’ to create another variation of your ad. By split testing a variety of different ads, you will be able to identify which ad performs the best.
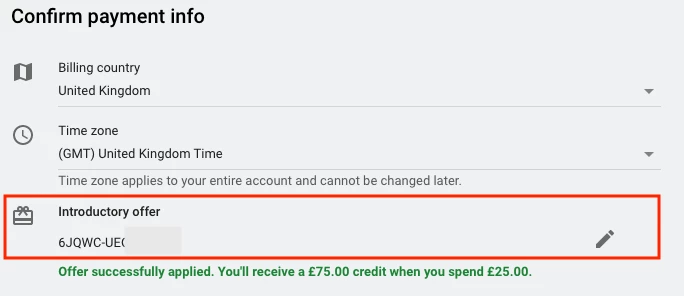
Step 6- Next, enter the coupon code you received and setup billing to claim £75 in free credit when you spend £25.
Tip #3 - How to use the Google Ads ad schedule to prevent budget wastage
Once you have finished setting up your Google Ads account, you will now see the Google Ads dashboard.
If you don’t setup an ad schedule, your ads will run all day every day. To setup an ad schedule, follow the steps below.
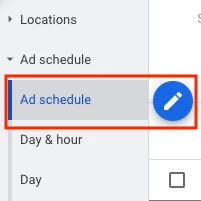
Step 1- Select your campaign and then on the left hand side, select ad schedule and click on the pencil to edit.
Step 2- Select the days and times you want your ads to run and then hit save.
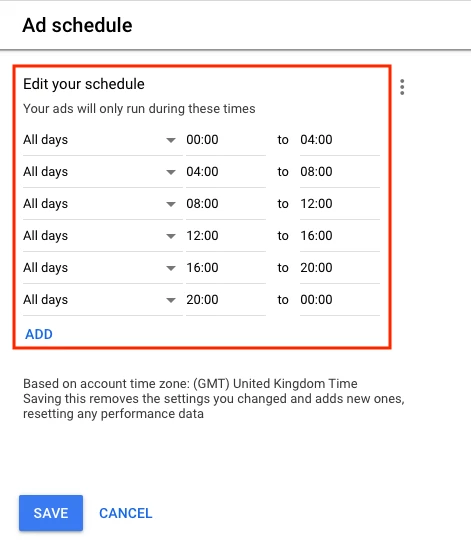
Quick tip- break down your ad schedule into time segments to see if a particular time period generates the most business. You can then make bid adjustments based on that data.
Tip #4- How to prevent your ads from showing outside of your target area
Even if you target a specific area within your campaign, its possible that your ads could show outside of that area due to the location settings. This can often cause budget wastage.
Step 1- Select your campaign and go to settings on the left hand side of the dashboard.

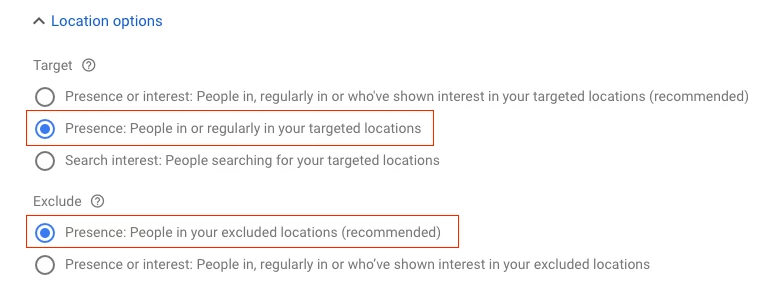
Step 2- Select locations and then location options.
Now select ‘People in or regularly in your targeted locations’ under target and ‘people in your excluded locations’ under exclude. Then hit save.
Tip #5- How to use Google Ads conversion tracking
Now that you have setup a Google Ads campaign, it is crucial that you are able to track your return on ad spend. By setting up conversion tracking, you will also be able to maximise your Google Ads potential.
Step 1- Go to tools / settings in top right of the dashboard and select ‘conversions’
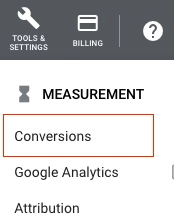
Step 2- Next, select the plus button to setup the first conversion action.
Step 3- You then have 4 options to choose from. Phone call tracking is often the most used and is suited for the locksmith example. Follow the steps below to setup phone call tracking.

Step 4- Select phone calls and then select the desired source. For this example, we will use the ‘Calls from ads using call extensions or call only ads’ source.

Step 5- Next, enter a conversion name such as ‘Calls from ads’ and select ‘Don’t use a value’ unless you know that every call turns into revenue. Also select ‘One’ under count so that conversions aren’t artificially inflated.
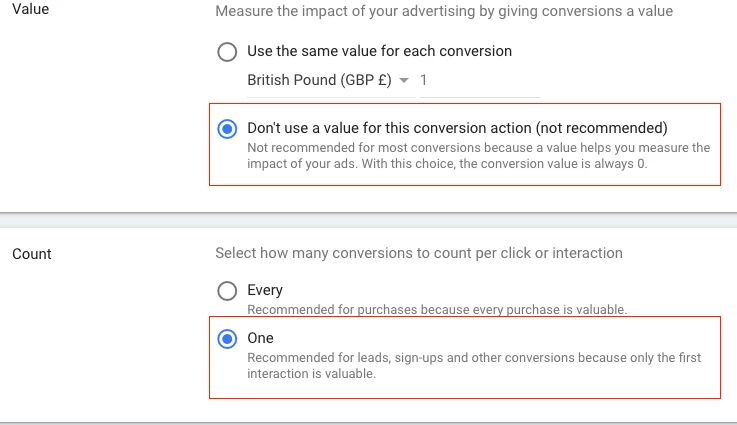
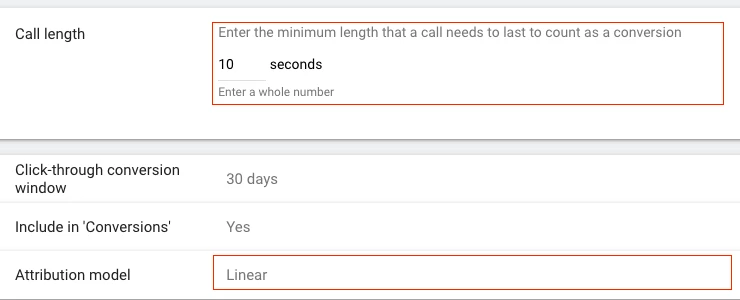
Step 6- Then select the minimum call length of 10 seconds or more.
We would recommend setting the attribution model to ‘linear’ as this will allow conversions to be attributed across all clicks on the click path. This will allow you to identify the click path a user took before converting.
Step 7- You will need to add the phone number as an extension to your ads so that your phone number shows. The ‘Calls from ad’s’ conversion action will then track the number of calls made directly from the ad.
Step 8- Select your campaign and then choose extensions from the ‘ads & extensions’ menu on the left hand side.
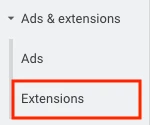
Step 9- Hit the plus button & select call extension.
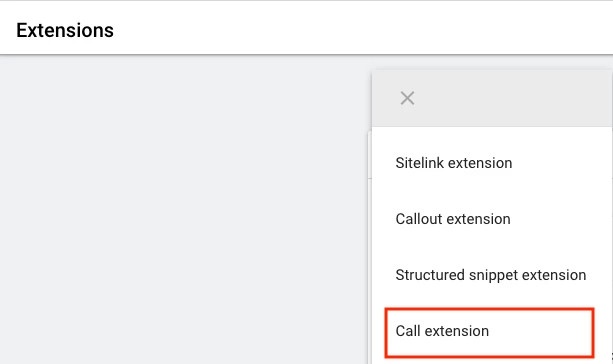
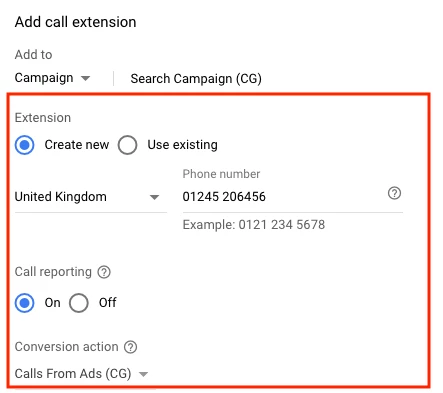
Step 10- Add to campaign & create a new extension.
Add required phone number —> Call reporting ‘On’ —> Select the conversion action you just set up —> ‘Calls from ads’ & hit save.
These 5 Tips will get you off to a flying start with your first Google Ads campaign.
Why not take it a step further and see how we can maximise your Google Ads potential?
